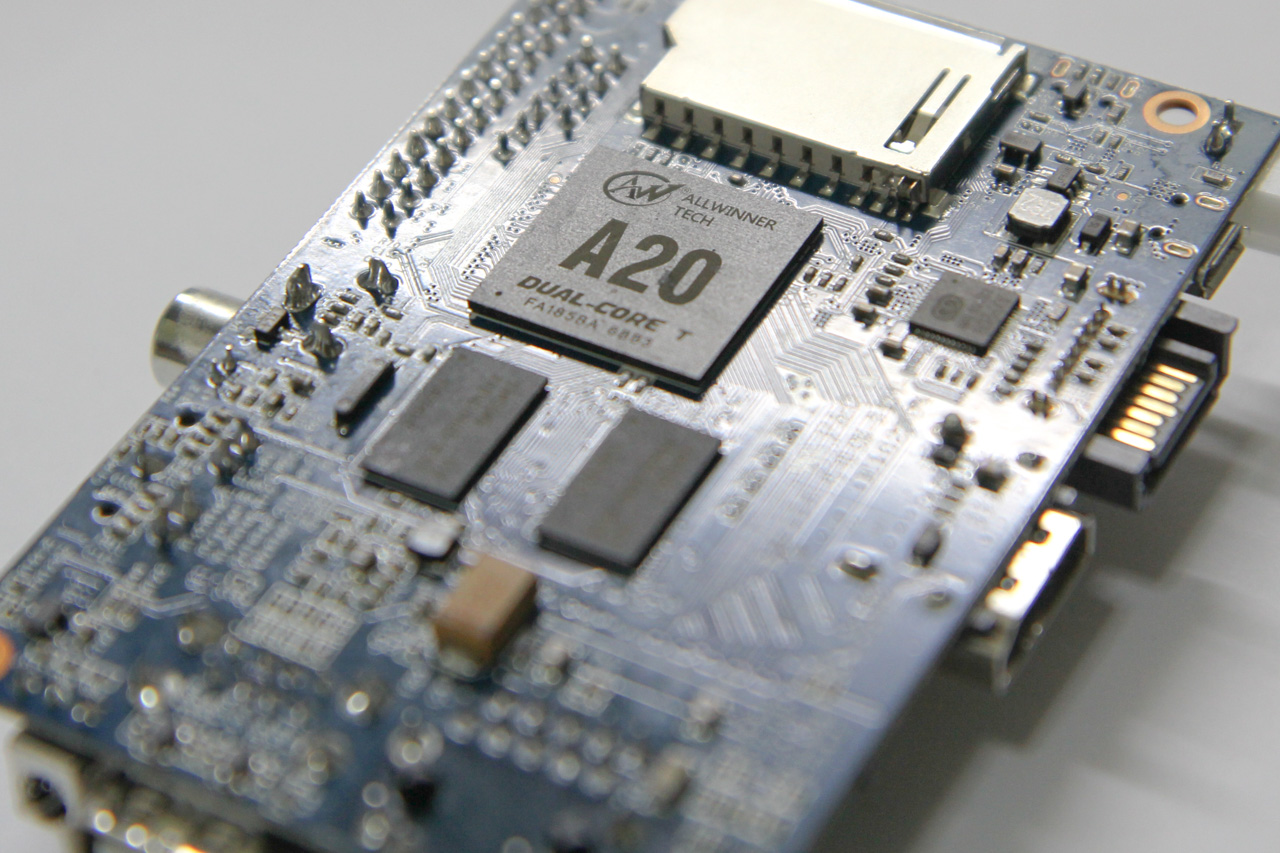
I bought a Banana Pi some time ago and have been using it as my go-to ARM box. Among the single-board computers I have, this Allwinner A20-based platform has the fastest CPU.
Similar to the (old) Raspberry Pi, it has a 26-pin GPIO header on one side that sports the same layout. This means that the 5V, 3V3 and I2C pins are the same as where they would be on the Raspberry Pi.
Device Tree & Overlays
On embedded systems, the Device Tree helps the kernel understand various peripherals that are connected to the board and how to initialize them. These hardware might be things like LDO regulators, various controllers, GPIO, etc which are generic, but yet needs certain configuration that should not be hard-coded into the kernel. To understand more about device trees I recommend you start with the Raspberry Pi documentation on this topic. There are more links at the end of this article.
To support Pi HATs and other non-HAT accessories, the Pi added a dtoverlay configuration parameter in the config.txt file. This allows you to specify, at boot time, Device Tree Overlays, which modify the board’s base device tree to specify additional peripherals like I2C devices, or to configure GPIO pins for certain purposes. The BeagleBone also has a similar mechanism to support its add-on boards via Capemgr. These mechanisms enable non-technical users to easily modify the device tree by simply editing a text file or running a command. Neither of these have been adopted into mainline Linux, so there is no provisions for doing quick overlays on other boards yet.
Fortunately for us, device tree overlay support has been merged into U-Boot, and the Banana Pi uses U-Boot for booting Linux. This means that U-Boot can perform the merging of device tree overlays with the base device tree, and pass the entire Flattened Device Tree (FDT) structure to the kernel during boot-up.
Before we get started, you will need the i2c-tools and dtc-overlay package, and the U-Boot source code for the mkimage tool (you did have to compile U-Boot for your Banana Pi right?)
Creating the Overlay
For this example, we will be attaching an INA219 current sensor to the Banana Pi over I2C. The kernel has drivers for this sensor in its hwmon subsystem and provides an easy way of reading values for us.
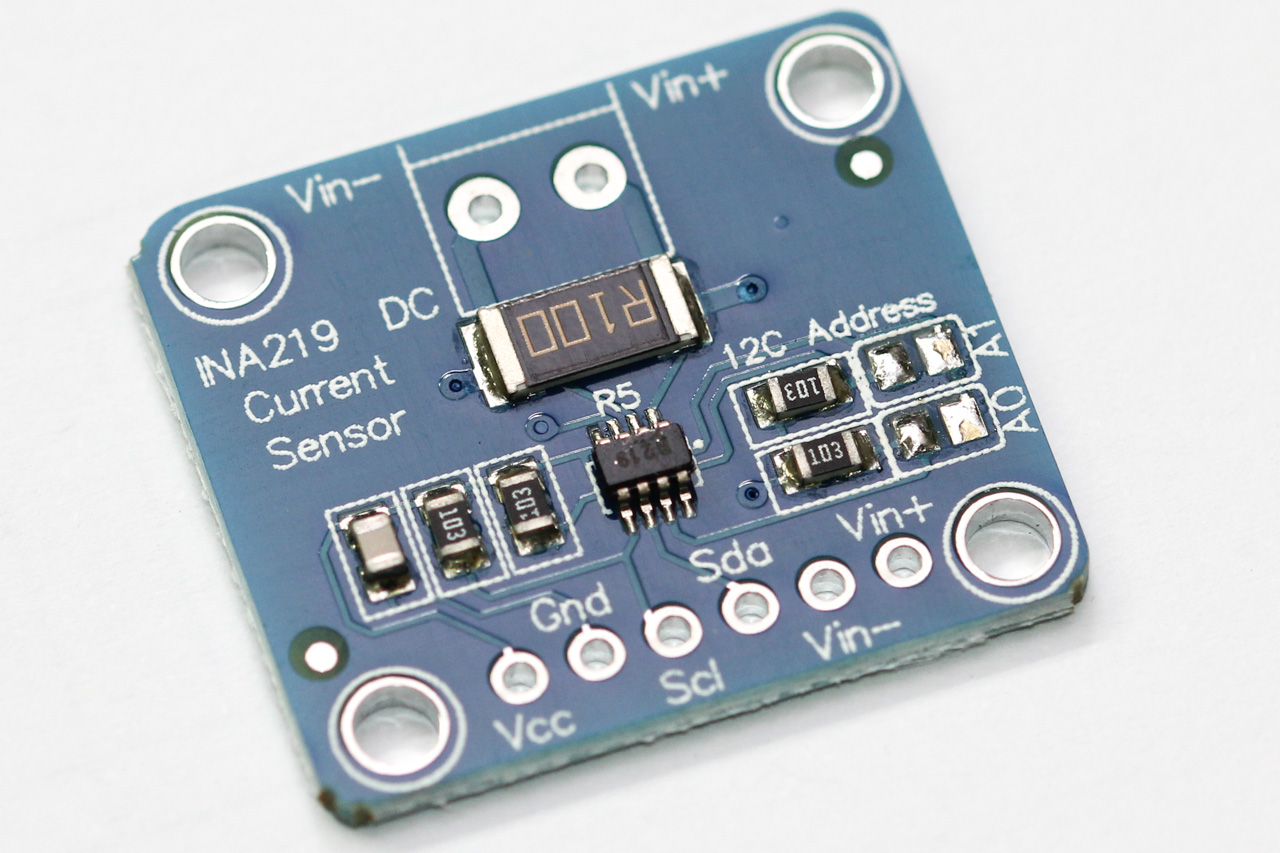
The default I2C address on most INA219 breakout boards is with the address lines A0 and A1 grounded, giving it an address of 0x40. Also note that the shunt resistor is marked with R100, which denotes 0.1 mΩ or 100,000 µΩ.
My Banana Pi has 3 I2C buses:
$ i2cdetect -l
i2c-1   unknown         mv64xxx_i2c adapter             N/A
i2c-2   unknown         sun4i_hdmi_i2c adapter          N/A
i2c-0   unknown         mv64xxx_i2c adapter             N/A
We will try scanning each of the buses, and the one with device 0x40 will likely be the bus that is exposed via the GPIO headers. We can do this using i2cdetect:
# i2cdetect -y 1
     0  1  2  3  4  5  6  7  8  9  a  b  c  d  e  f
00:          -- -- -- -- -- -- -- -- -- -- -- -- --
10: -- -- -- -- -- -- -- -- -- -- -- -- -- -- -- --
20: -- -- -- -- -- -- -- -- -- -- -- -- -- -- -- --
30: -- -- -- -- -- -- -- -- -- -- -- -- -- -- -- --
40: 40 -- -- -- -- -- -- -- -- -- -- -- -- -- -- --
50: -- -- -- -- -- -- -- -- -- -- -- -- -- -- -- --
60: -- -- -- -- -- -- -- -- -- -- -- -- -- -- -- --
70: -- -- -- -- -- -- -- --
The last parameter to i2cdetect specifies the bus number, which is 1 in this case. We can see here that the INA219 has been correctly wired and detected, as it shows up in the I2C bus scan.
We now need to find out which device tree node this bus corresponds to:
$ readlink /sys/class/i2c-adapter/i2c-1/of_node
../../../../../firmware/devicetree/base/soc@1c00000/i2c@1c2b400
In order to figure out the symbolic name for this I2C bus, we can grep from the kernel’s live device tree, parsed with the help of the dtc utility:
# dtc -I fs /proc/device-tree | grep 1c2b400
...
    i2c2 = "/soc@1c00000/i2c@1c2b400";
Using this symbolic name, we can now specify the target node for our device tree fragment to overlay into. This is what the overlay file (ina219.dts) looks like, having a fragment that adds a node to the i2c2 bus:
/dts-v1/;
/plugin/;

/ {
    compatible = "allwinner,sun7i-a20";

    fragment@0 {
        target = <&i2c2>;
        __overlay__ {
            #address-cells = <1>;
            #size-cells = <0>;

            ina219@40 {
                status = "okay";
                compatible = "ti,ina219";
                reg = <0x40>;
                shunt-resistor = <100000>;  // R100
            };
        };
    };
};
Compile the device tree overlay into a Device Tree Blob (DTB):
dtc -@ -I dts -O dtb -o ina219.dtb ina219.dts
After compilation, verify that it has been correctly compiled using fdtdunp. You should see that the dumped file looks almost similar to the original “source” version, with the exception of a 0xdeadbeef handle and an additional __fixups__ fragment appended at the end.
$ fdtdump ina219.dtb
/dts-v1/;
// magic:               0xd00dfeed
// totalsize:           0x1a4 (420)
//   . . .
// size_dt_struct:      0x120

/ {
    compatible = "allwinner,sun7i-a20";
    fragment@0 {
        target = <0xdeadbeef>;
        __overlay__ {
            .
            .
            .
        };
    };
    __fixups__ {
        i2c2 = "/fragment@0:target:0";
    };
};
The __fixups__ fragment is how the device tree parser will perform run-time bindings, by replacing the magic values “ with the correctly resolved handle as specified by the symbol name.
Place this DTB file into a location accessible by U-Boot, like /boot/dtbs/ina219.dtb. Note that I’m using /boot/dtbs because that’s where Arch Linux ARM installs the DTBs.
U-Boot Boot Script
U-Boot can load a script file to decide how to boot the machine.
I used the base U-Boot script for the Cubietruck, which is also based on the Allwinner A20, and added fdt commands to load and overlay DTBs:
part uuid ${devtype} ${devnum}:${bootpart} uuid
setenv bootargs console=${console} root=PARTUUID=${uuid} rw rootwait

if load ${devtype} ${devnum}:${bootpart} ${kernel_addr_r} /boot/zImage; then
  if load ${devtype} ${devnum}:${bootpart} ${fdt_addr_r} /boot/dtbs/${fdtfile}; then

    // FDT overlay code here
    fdt addr ${fdt_addr_r}
    fdt resize

    setexpr fdtovaddr ${fdt_addr_r} + F000
    load ${devtype} ${devnum}:${bootpart} ${fdtovaddr} /boot/dtbs/ina219.dtb && fdt apply ${fdtovaddr}

    if load ${devtype} ${devnum}:${bootpart} ${ramdisk_addr_r} /boot/initramfs-linux.img; then
      bootz ${kernel_addr_r} ${ramdisk_addr_r}:${filesize} ${fdt_addr_r};
    else
      bootz ${kernel_addr_r} - ${fdt_addr_r};
    fi;
  fi;
fi
We choose an arbitrary address somewhere after the loaded FDT (+ 0xF000) to load our overlay DTB file. After the overlay has been loaded, we apply it to the base DTB using fdt apply. We can repeat this for multiple DTB files, loading and applying each one to the base DTB, which was specified by fdt addr, as long as there is enough space.
The script could also have been much simpler with just 4 load commands and a bootz, but this is how they wrote it for Arch Linux ARM. Also, note that the variable names are non-standard across different platforms; some “standard” variables like $loadaddr are not present in the sunxi platform (code name for these Allwinner SoCs). For a list of environment variables, you can either issue a printenv at the U-Boot prompt, or consult include/configs/sunxi-common.h in the U-Boot source. You will only need to worry about this if you are trying to adapt the script for another platform.
Compile the script using the mkimage tool, found in the tools directory when you compile U-Boot for your Banana Pi:
$ ./tools/mkimage -T script -A arm -C none -d boot.cmd boot.scr
Image Name:
Created:      Thu Jul 19 22:03:43 2018
Image Type:   ARM Linux Script (gzip compressed)
Data Size:    815 Bytes = 0.80 KiB = 0.00 MiB
Load Address: 00000000
Entry Point:  00000000
Contents:
   Image 0: 807 Bytes = 0.79 KiB = 0.00 MiB
Copy this “compiled” U-Boot script file into /boot on the SD card, which is what U-Boot will load. This is the same step in the Arch Linux ARM installation wiki, except that they have already pre-compiled boot.scr for you.
Before you do that, keep a working copy of the boot.scr as boot.scr2 or something. See the Troubleshooting section on how this helps.
Now reboot.
If you have a serial UART cable plugged in to the Banana Pi’s serial console port, you should see U-Boot messages as it tries to run the boot script:
U-Boot 2018.05-00526-g680a52c350-dirty (Jun 02 2018 - 01:28:03 +0000) Allwinner Technology

CPU:   Allwinner A20 (SUN7I)
Model: LeMaker Banana Pi
I2C:   ready
DRAM:  1 GiB
.
.
Hit any key to stop autoboot:  0
switch to partitions #0, OK
mmc0 is current device
Scanning mmc 0:1...
Found U-Boot script /boot/boot.scr
968 bytes read in 6 ms (157.2 KiB/s)
## Executing script at 43100000
6172568 bytes read in 346 ms (17 MiB/s)    <-- zImage
38879 bytes read in 104 ms (364.3 KiB/s)   <-- $fdtfile
880 bytes read in 620 ms (1000 Bytes/s)    <-- overlay DTB
5367414 bytes read in 302 ms (16.9 MiB/s)  <-- initramfs-linux.img
## Flattened Device Tree blob at 43000000
   Booting using the fdt blob at 0x43000000
   Loading Ramdisk to 49ae1000, end 49fff676 ... OK
   reserving fdt memory region: addr=43000000 size=a000
   Loading Device Tree to 49ad4000, end 49ae0fff ... OK

Starting kernel ...
Each of the “nnn bytes read” message correspond to a load command in the script, which I have annotated above. You can use that to determine if all the load operations were successful.
After the Banana Pi reboots, check that the kernel has recognized the device and automatically loaded the driver for it:
$ dmesg | grep ina2xx
[   10.966597] ina2xx 1-0040: power monitor ina219 (Rshunt = 100000 uOhm)

$ lsmod | grep ina2xx
ina2xx_adc             20480  0
ina2xx                 16384  0
You should now be able to read the values using sensors (from the lm_sensors package):
$ sensors
ina219-i2c-1-40
Adapter: mv64xxx_i2c adapter
in0:          +0.00 V
in1:          +0.88 V
power1:        0.00 W
curr1:        +0.00 A
Improved Script
To avoid hard-coding the overlay filenames, we could modify the U-Boot script to dynamically load with the overlays we want, something like config.txt on the Raspberry Pi. This means that the U-Boot script only needs to be compiled once.
Let’s store the overlay filenames in a variable called $overlay and put load and fdt apply inside a for loop:
for ov in ${overlay}; do
    echo overlaying ${ov}...
    load ${devtype} ${devnum}:${bootpart} ${fdtovaddr} /boot/dtbs/${ov}.dtb && fdt apply ${fdtovaddr}
done
Now we just need a way to read this $overlay variable from a file. We can do this with env import, which is used for importing uEnv.txt, a line-based file with key-value pairs used by U-Boot to persist environment variables (i.e. settings). A side-effect from this is we also need to specify the key name in the file, like so:
overlay=abc ina219
Now we just need to put this line in /boot/dtbs/overlay.txt and the appropriate DTBs in the same directory.
I have also added a few echo statements in the updated script to help with diagnostics:
Found U-Boot script /boot/boot.scr
1080 bytes read in 6 ms (175.8 KiB/s)
## Executing script at 43100000
6222920 bytes read in 350 ms (17 MiB/s)
39692 bytes read in 85 ms (455.1 KiB/s)
19 bytes read in 410 ms (0 Bytes/s)
loaded overlay.txt: abc ina219
overlaying abc...
** File not found /boot/dtbs/abc.dtb **
overlaying ina219...
420 bytes read in 720 ms (0 Bytes/s)
5408239 bytes read in 304 ms (17 MiB/s)
## Flattened Device Tree blob at 43000000
   Booting using the fdt blob at 0x43000000
   Loading Ramdisk to 49ad7000, end 49fff5ef ... OK
   reserving fdt memory region: addr=43000000 size=a000
   Loading Device Tree to 49aca000, end 49ad6fff ... OK

Starting kernel ...
Conclusion
Just to summarize, you will need:
- Compiled
/boot/boot.scrU-Boot script /boot/dtbs/overlay.txtto specify overlay filenames to load/boot/dtbs/ina219.dtb, the device tree blob overlay
You can find these sample files here.
Even though this does not get you near the ease-of-use of a Pi HAT or Beaglebone Cape, it should help you to add accessories to your board dynamically, and still allow upgrades to the latest kernel without having to recompile anything.
Troubleshooting
If Linux doesn’t boot up, you will need a serial cable to view the output from U-Boot.
Kernel Device Tree
The kernel’s version of the device tree (the live device tree) is exposed via /proc/device-tree. You can convert the filesystem tree into a more readable form using dtc:
dtc -I fs /proc/device-tree
This should help you check whether U-Boot has assembled the FDT structure correctly.
fdt apply
Initially there was some problem if I just tried fdt apply $overlay_addr:
Found U-Boot script /boot/boot.scr
## Executing script at 43100000
.
.
.
failed on fdt_overlay_apply(): FDT_ERR_NOPHANDLES
base fdt does did not have a /__symbols__ node
Does the base device tree not have a __symbols__ node required for run-time bindings?
Let’s check it:
$ fdtdump /boot/dtbs/sun7i-a20-bananapi.dtb | grep -C3 __symbols__
        gpio = <0x00000019 0x00000007 0x00000017 0x00000000>;
        phandle = <0x00000030>;
    };
    __symbols__ {
        cpu0 = "/cpus/cpu@0";
        cpu_alert0 = "/thermal-zones/cpu_thermal/trips/cpu_alert0";
        cpu_crit = "/thermal-zones/cpu_thermal/trips/cpu_crit";
We can clearly see that the base DTB has the required __symbols__ node, meaning we should have been able to apply an overlay.
Another reason why fdt_overlay_apply fails is that there is not enough space for new handles. To fix this, we need to resize the FDT in memory to accomodate more handles:
fdt resize 8192
The extra_size argument is optional, which is why it is not used in my boot script above.
Faster Debug Cycle
If you mess up your boot.scr file, U-Boot will move on to try other types of boot methods, such as USB mass storage or PXE.
In order to boot normally, you can keep a backup of boot.scr before you proceed. When the boot script fails, you can interrupt the boot process to get a U-Boot prompt and manually boot the backup script using the following commands:
setenv boot_scripts boot.scr2
boot
This should help you get back into Linux quickly, and continue iterating. It is much easier to compile and copy files from the Banana Pi locally than to do it elsewhere and somehow transfer it to your Banana Pi.
Further Reading
- Device Tree for Dummies: https://elinux.org/images/f/f9/Petazzoni-device-tree-dummies_0.pdf
- Raspberry Pi and the Device Tree: https://www.raspberrypi.org/documentation/configuration/device-tree.md
- Device Tree overlay support in the Linux Kernel: https://www.kernel.org/doc/Documentation/devicetree/overlay-notes.txt
- FDT overlays in U-Boot: https://github.com/u-boot/u-boot/blob/master/doc/README.fdt-overlays

Very informative.Thanks for the examples.
Glad you found it useful!
Thank you very much for the thorough explanation!
[…] Boot-time Device Tree Overlays with U-Boot […]