Fixing My Vintage Mirror with 3D Printing

Some painters came over to give my house a new coat of paint for the new year, and in the process wrecked my vintage bathroom mirror. We have what’s called a tilting mirror or pivot mirror in the bathroom area, which we have been using for at least 50 years in the household. We adjust the mirror tilt every day for decades and it has never broke. This style of mirror is quite uncommon these days, perhaps because it has gone out of fashion.

broken mirror bracket, snapped off at the screw portion with the thumbnut still attached

Looking at the damage, it was clear they forcefully tried to remove the nuts securing the mirror and it just snapped off. The other bracket on the opposite side broke off too, but at a different location. I’m no metallurgist but it looks like the part was made from cast iron or something, and therefore quite brittle. For years now I didn’t dare to dismantle the mirror for exactly this reason: the thumbnut loosens up till a certain point then refuse to go further, which is also why I left it in place. I have already removed everything I could for them – toothbrush holders, any hanging towels and racks. Anything else still left on the wall is obviously not removable, or I would have done so already. But these fuckers took it upon themselves to try to remove the mirror when I left them alone for an hour. To say I was very pissed is an understatement.

When they told me they broke the mirror, I thought they had shattered the mirror glass. I was at least a little hopeful when I saw they had placed the mirror under the sink. Still, I was at a loss of how to fix the mirror, until the idea of leveraging 3D printing hit me days later. I’ve known about it since the MakerBot days (and it was a hot topic at maker faires) but since I don’t have a 3D printer or easy access to one, it was just something I didn’t care too much about.

What is in its place now is a piece of IKEA BLODLÖNN, which I have used 3M Command strips to temporarily hold in place, while I tried to learn enough FreeCAD to design a replacement bracket. Buying IKEA was the cheapest option, and I had an inkling that learning FreeCAD from scratch was going to be a steep learning curve, so we needed something to use in the meantime (we kept looking up but finding ourselves staring at a blank wall). You can see the metal supports arms for the tilting mirror are left intact on the wall, but now painted white1.

white wall with a piece of BLODLÖNN mirror, flanked by metal support arms for the old mirror

Follow me as I detail how difficult it is for someone with zero experience like myself to learn FreeCAD, which hopefully inspires you not to give up, and the final results of my journey.
Continue reading

Setting Up a Zigbee Sensor Network

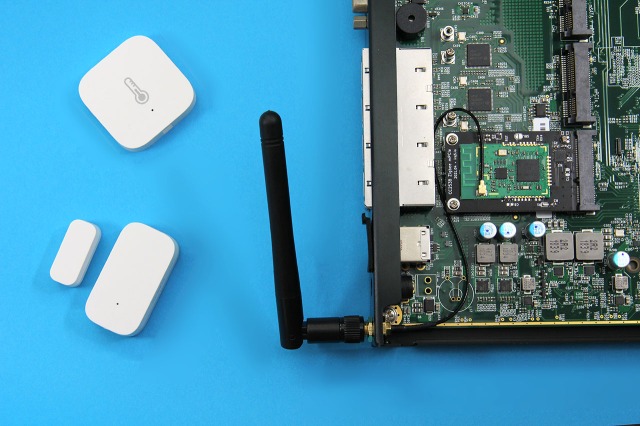
The advantage of Zigbee devices is that they are very low power, and they communicate in a wireless mesh network. The sensors are small and can work off a CR2032 coin cell for at least 2 years, maybe more. Depending on the type of sensor, they cost around US$10 and are readily available from various manufacturers, such as Xiaomi, Aqara (pictured below) or IKEA under their TRÅDFRI range of products.

You typically pair these sensors with a Zigbee gateway, which speaks the IEEE 802.15.4 protocol and relays the information (e.g. sensor readings) to either your mobile app or stores it in the cloud (or the gateway itself). But as you can imagine, a Raspberry Pi with the right adapter can do this job and offer more flexibility.

Continue reading

Using U2F for Door Access Control Systems

I was looking at trying to securely implement a door access control system. This usually involves some kind of card that you tap at a reader and the door unlocks.

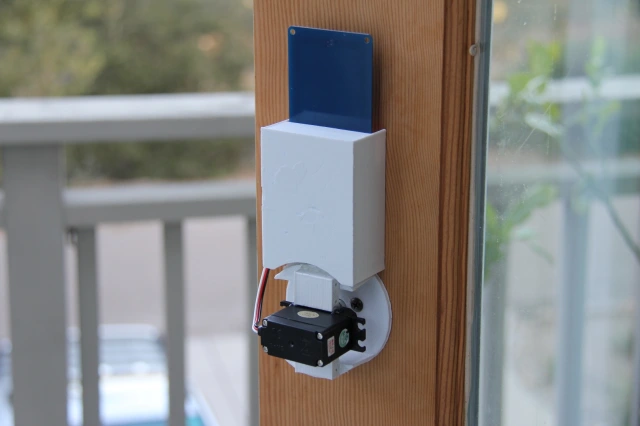
Because it uses NFC, the NFC reader and electronics can be located safely on the inside, leaving no exposed DIY electronics on the outside for attackers to fiddle around with. Here’s an example project using a 3D-printed enclosure:

photo of a DIY NFC door lock found on Instructables.com, with all the electronics & parts on the interior side of the door

A lot of those DIY projects work, but they are just not secure:

Just look at the code and you will see what I mean. They generally look like this:

uint32_t uid = nfc.readCardId();    // read the card's unique ID
if (uid == 0xAAAAAAAA || uid == 0xBBBBBBBB || ...) {
    unlock(); // YES!!
}

Unfortunately, consumer smart locks like a Yale or Samsung do pretty much the same thing, without hard-coding UIDs of course. When you enroll cards, the door lock will simply record the UID and will unlock when you present a card (or tag) with that UID. MIFARE Classic cards are commonly used for this purpose because they are very inexpensive. They are factory-programmed with a unique identifier stored in sector 0, which is read-only.

Continue reading

Custom Firmware for the Xiaomi AX3600 Wireless Router

As I have mentioned in the review, the stock firmware on the Xiaomi AX3600 wireless router is extremely limiting. On top of that, the firmware is also locked to install only authorized updates from the manufacturer. If you have been following the blog, you will know that I like the flexibility that ASUSWRT provides for customizing my router.

While there is currently an on-going effort to try and port vanilla OpenWRT for this router, I suspect that might take some time. In this post, I describe how to workaround the lousy firmware and configure the router with the advanced features I need.

Router Disassembly

It is recommended to have UART access handy, in case something bad happens and you need to recover your router, or if you want access to U-Boot, the bootloader. This would require you to crack open your router, so you might only want to do this if necessary. Feel free to skip this section if you are not interested in the hardware, or don’t need low-level access.

router top view, with cover opened

You need to unscrew 5 screws, 4 of which are hidden under the rubber feet, and one under the center sticker label. In the disassembled top view photo here, you can see the screw holes at the corners, as well as a missing chunk in the center of the heatsink for the mating screw post, directly aligned with the AIoT antenna and indicator LEDs.

Continue reading

Xiaomi AIoT Wireless Router AX3600 Review

I recently bought the Xiaomi AIoT AX3600 wireless router to experience WiFi 6 (or 802.11ax). This WiFi 6 router has been touted as having very good hardware specs for under US$100. After checking out a few reviews, it looked like you could achieve close to Gigabit speeds over a wireless link, which was pretty exciting. It reminded me of the time I upgraded my home network to Gigabit and could finally copy large files over the network quickly. I decided to get my hands on one and evaluate it with some speed tests around the house.

the Xiaomi AX3600 wireless router

I don’t have any compatible WiFi 6 devices yet, so I ordered an Intel AX200NGW wireless card to replace the one in my laptop. These cards typically go for US$15 on AliExpress or eBay.

Continue reading