Batch Binary Analysis with IDA Pro 7.4 Automation

It is easy to script analysis steps with IDAPython, but now we want to automate this analysis over, let’s say, 10,000 files. I did a quick Google and I couldn’t find a guide on how to perform batch binary analysis tasks by automating IDA Pro 7.x.

Unfamiliar with this, I was constantly guessing whether it was the command-line arguments, the script, or a combination of both that was not working. I’m sharing my experience here so you won’t have to be fumbling around like I was.

I will be using IDA Pro for Windows here, but it should be applicable to any of their supported platforms like Mac or Linux.

Simple Binary Analysis

Let’s write some simple IDAPython analysis script and run it within the IDA Pro console. This script loops through all functions in the executable and prints out its address and name:

import idc
import idautils

print 'count %d' % len(list(idautils.Functions()))
for ea in idautils.Functions():
    print hex(ea), idc.get_func_name(ea)

The idautils module contains higher-level functionality like getting a list of functions, or finding code & data references to addresses. If you are familiar with IDC scripting, most of the functions by the same name can be found within the idc module. This is not really meant to be an IDAPython or IDC scripting tutorial, so you will need to look elsewhere for that.

Continue reading

Generating Small Static Binaries

I’ve recently seen some shell script that tries to test for your OS architecture by running executables encoded within. There’s one for i386 (x86 platforms) and a few for ARM variants.

test_i386()
{
cat << EOF | $_base64 > /tmp/archtest && chmod a+x /tmp/archtest
f0VMRgEBAQAAAAAAAAAAAAIAAwABAAAA5oAECDQAAACoEAAAAAAAADQAIAAEAC
AAAAAIAECACABAgUBwAAFAcAAAUAAAAAEAAAAQAAANwPAADcnwQI3J8ECDgAAA
  .  .  .
AAAAAAAgAAAAAAAAAFYAAAABAAAAMAAAAAAAAAAUEAAAMgAAAAAAAAAAAAAAAQ
AwAAAAAAAAAAAAAARhAAAF8AAAAAAAAAAAAAAAEAAAAAAAAA
EOF
/tmp/archtest > /dev/null 2>&1 && arch=i386
}

What is terrible (well, to me at least) is that these executables are huge:

$ ls -l *.bin
-rwxrwx--- 1 root root 4832 Jul 17 06:58 archtest-armv6.bin
-rwxrwx--- 1 root root 4820 Jul 17 06:59 archtest-armv7.bin
-rwxrwx--- 1 root root 4992 Jul 17 06:59 archtest-armv8.bin
-rwxrwx--- 1 root root 4824 Jul 17 06:57 archtest-x86.bin

For one, I’m not sure why inspecting /proc/cpuinfo or uname -a is not really sufficient for their needs. And also, why such large binaries are required.

After all, what you want to do is just to check that it executes successfully. Were they trying to test for the presence of a working libc? Nope, because the binaries are statically-linked:

$ file ./archtest-x86.bin
./archtest-x86.bin: ELF 32-bit LSB executable, Intel 80386, version 1 (SYSV), statically linked, stripped

I think this just adds unnecessary bloat.

There are ways to make smaller binaries.

Now, I am not talking about crazy techniques like using assembly language instead of C, or making a weird ELF that might load only on Linux, but just using normal C and the standard gcc and binutils.

Let’s get started.

Continue reading

Data Encryption on Firefox Send

If you haven’t heard, Firefox Send is a service that solves the problem of sending large attachments without going through email. It does this in a privacy-preserving manner by encrypting the file in your browser first, before upload.

The concept is simple:

  1. An encryption key is generated in your browser
  2. Your file is encrypted with that key before being uploaded to the server.
  3. The download URL is returned by the server,
    but will only work after the browser appends the secret key to the URL fragment.

Note that URL fragments are never sent to the server. They are often used for page anchors, and sometimes to keep track of local state in SPA.

This has been made possible through the use of Web Crypto API exposed via JavaScript.

Technical Details

The code that powers Firefox Send is actually open source, so you can run your own server, or read the code to figure out exactly how it works. The encryption details are documented in docs/encryption.md.

A master key is first generated and from it, a few keys are derived using HKDF SHA-256. The derived key length depends on its purpose, so for AES-128 encryption, the key will be 128-bit. Oddly though, the Subtle Crypto API returns a a 512-bit key for HMAC SHA-256, which had me stumped for a while. I wrote some code that you can try out online.

Because HKDF is based on a hash algorithm, derived keys are inherently not reversible to obtain the master key from which they were derived (unless the algorithm itself is somehow broken).

3 keys are derived from the master key:

  1. Data Encryption key. Used to encrypt the actual file contents.
  2. Authentication key. Given to the service and used to authenticate future downloaders.
  3. Metadata key. Used to encrypt the upload manifest (filename and size information) for display.

keys derived in Firefox Send

Continue reading

Crypto-Erasing BitLocker Drives

These days with larger and larger drive capacities, erasing stored data takes longer and longer. Another problem is also the inability to do so when the time comes, due to bad sectors or hardware failures. Just because the data is not accessible by you does not mean that it is also inaccessible to someone else with the know-how.

Cryptographic erasure to the rescue!

Crypto erase simply erases the encryption key that is used to encrypt the data on your drive. This is the primary reason why I encrypt my drives.

Oddly, I have not found anyone talking about BitLocker crypto erasure or doing it. The closest I have seen is manage-bde -forcerecovery, which removes all TPM-related key protectors. This is briefly described in a TechNet article titled BitLockerâ„¢ Drive Encryption and Disk Sanitation.

But what if we are not running Windows? What if the disk is not a Windows boot drive that is protected by a TPM key protector?

In order to erase the (key) data, we first need to know how the data is stored on disk. For open-source FDE implementations, this is easy because the disk format is well-documented, but BitLocker is not exactly open.

BitLocker Disk Format

BitLocker was first introduced in Windows Vista and has gone through changes since then. Some changes were made to the format in Windows 7, but has largely remained unchanged through Windows 8 till 10.

For LUKS, it is simple – there is a LUKS header at the start of the disk, followed by the encrypted volume data. For BitLocker, it is slightly more involved, probably due to backward-compatible design considerations.

The header at the start of the partition is a valid boot sector (or boot block), so not all BitLocker information can be stored within. Instead, this volume header points to the FVE metadata block where most of the data is kept. In fact, there are 3 of these for redundancy. This metadata block is what holds all the key material.

The metadata blocks are spaced (almost) evenly apart, located near the start of the volume.

# blwipe -offset 0x2010000 bitlocker-2gb.vhd
metadata offset 0: 0x02100000
metadata offset 1: 0x100c8000
metadata offset 2: 0x1e08f000
metadata block 0 (size 65536): parsed OK
metadata block 1 (size 65536): parsed OK
metadata block 2 (size 65536): parsed OK

The first metadata block usually begins at 0x02100000. This illustration depicts the locations for a 2 GB volume:

Diagram of disk layout with FVE metadata blocks marked out

If there are 3 of these blocks, how do we know know which ones contain valid data?

Continue reading

Writing Code for the ATtiny10

I previously wrote about the hardware aspects of getting your code into an ATtiny10 some 7 years ago (wow that was realllyy a long time ago!).

Now, avrdude is at version 6.3 and the TPI bitbang implementation has already been integrated in. The upstream avr-gcc (and avr-libc) also have proper support for ATtiny10s now. These software components are bundled with most distributions, including the Arduino IDE, making it easily accessible for anyone. Previously a fully integrated and working toolchain only came from Atmel and it was behind a registration page.

The price of the ATtiny10 has also dropped by a lot. When I first bought this microcontroller in 2010, element14 carried it for $1.85 in single quantities. Now, they are only $0.56 each.

I thought I’d write up a short post about writing and compiling code for it.

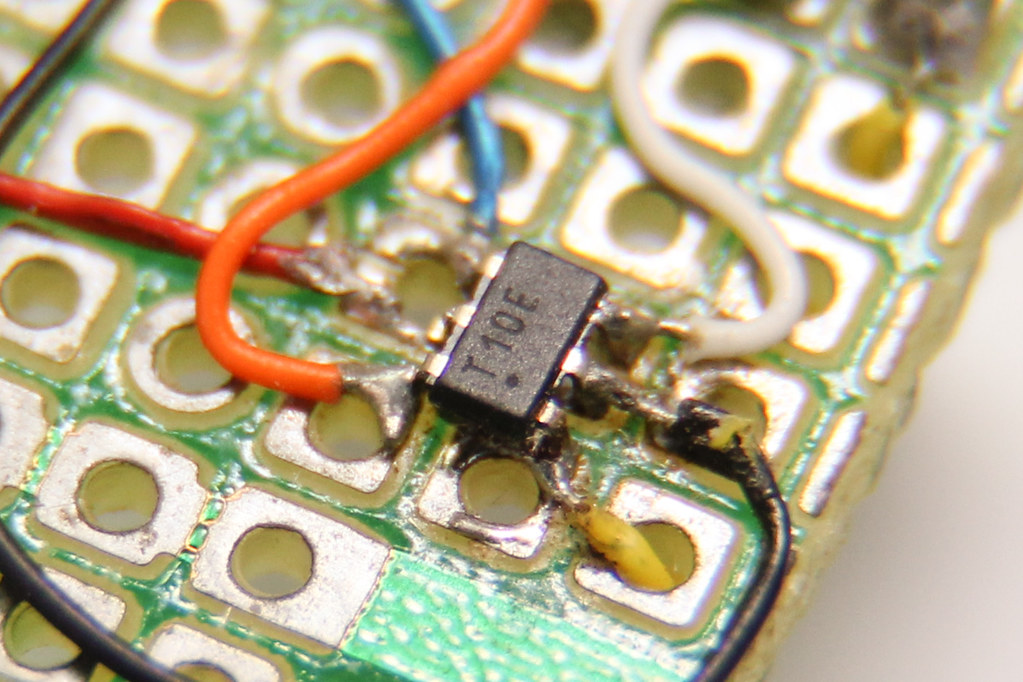
ATtiny10 on a prototyping board

Continue reading