Setting Up a Zigbee Sensor Network

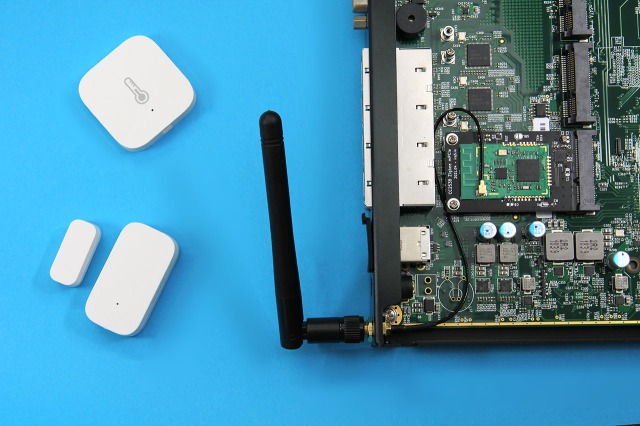
The advantage of Zigbee devices is that they are very low power, and they communicate in a wireless mesh network. The sensors are small and can work off a CR2032 coin cell for at least 2 years, maybe more. Depending on the type of sensor, they cost around US$10 and are readily available from various manufacturers, such as Xiaomi, Aqara (pictured below) or IKEA under their TRÅDFRI range of products.

You typically pair these sensors with a Zigbee gateway, which speaks the IEEE 802.15.4 protocol and relays the information (e.g. sensor readings) to either your mobile app or stores it in the cloud (or the gateway itself). But as you can imagine, a Raspberry Pi with the right adapter can do this job and offer more flexibility.

Continue reading

Advertisement

Using U2F for Door Access Control Systems

I was looking at trying to securely implement a door access control system. This usually involves some kind of card that you tap at a reader and the door unlocks.

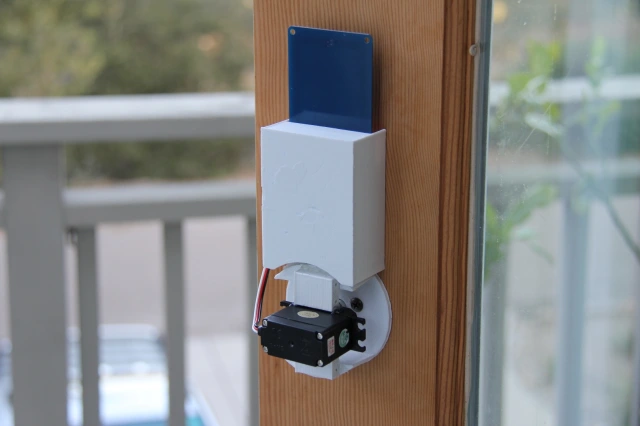
Because it uses NFC, the NFC reader and electronics can be located safely on the inside, leaving no exposed DIY electronics on the outside for attackers to fiddle around with. Here’s an example project using a 3D-printed enclosure:

photo of a DIY NFC door lock found on Instructables.com, with all the electronics & parts on the interior side of the door

A lot of those DIY projects work, but they are just not secure:

Just look at the code and you will see what I mean. They generally look like this:

uint32_t uid = nfc.readCardId();    // read the card's unique ID
if (uid == 0xAAAAAAAA || uid == 0xBBBBBBBB || ...) {
    unlock(); // YES!!
}

Unfortunately, consumer smart locks like a Yale or Samsung do pretty much the same thing, without hard-coding UIDs of course. When you enroll cards, the door lock will simply record the UID and will unlock when you present a card (or tag) with that UID. MIFARE Classic cards are commonly used for this purpose because they are very inexpensive. They are factory-programmed with a unique identifier stored in sector 0, which is read-only.

Continue reading

Custom Firmware for the Xiaomi AX3600 Wireless Router

As I have mentioned in the review, the stock firmware on the Xiaomi AX3600 wireless router is extremely limiting. On top of that, the firmware is also locked to install only authorized updates from the manufacturer. If you have been following the blog, you will know that I like the flexibility that ASUSWRT provides for customizing my router.

While there is currently an on-going effort to try and port vanilla OpenWRT for this router, I suspect that might take some time. In this post, I describe how to workaround the lousy firmware and configure the router with the advanced features I need.

Router Disassembly

It is recommended to have UART access handy, in case something bad happens and you need to recover your router, or if you want access to U-Boot, the bootloader. This would require you to crack open your router, so you might only want to do this if necessary. Feel free to skip this section if you are not interested in the hardware, or don’t need low-level access.

router top view, with cover opened

You need to unscrew 5 screws, 4 of which are hidden under the rubber feet, and one under the center sticker label. In the disassembled top view photo here, you can see the screw holes at the corners, as well as a missing chunk in the center of the heatsink for the mating screw post, directly aligned with the AIoT antenna and indicator LEDs.

Continue reading

Xiaomi AIoT Wireless Router AX3600 Review

I recently bought the Xiaomi AIoT AX3600 wireless router to experience WiFi 6 (or 802.11ax). This WiFi 6 router has been touted as having very good hardware specs for under US$100. After checking out a few reviews, it looked like you could achieve close to Gigabit speeds over a wireless link, which was pretty exciting. It reminded me of the time I upgraded my home network to Gigabit and could finally copy large files over the network quickly. I decided to get my hands on one and evaluate it with some speed tests around the house.

the Xiaomi AX3600 wireless router

I don’t have any compatible WiFi 6 devices yet, so I ordered an Intel AX200NGW wireless card to replace the one in my laptop. These cards typically go for US$15 on AliExpress or eBay.

Continue reading

Batch Binary Analysis with IDA Pro 7.4 Automation

It is easy to script analysis steps with IDAPython, but now we want to automate this analysis over, let’s say, 10,000 files. I did a quick Google and I couldn’t find a guide on how to perform batch binary analysis tasks by automating IDA Pro 7.x.

Unfamiliar with this, I was constantly guessing whether it was the command-line arguments, the script, or a combination of both that was not working. I’m sharing my experience here so you won’t have to be fumbling around like I was.

I will be using IDA Pro for Windows here, but it should be applicable to any of their supported platforms like Mac or Linux.

Simple Binary Analysis

Let’s write some simple IDAPython analysis script and run it within the IDA Pro console. This script loops through all functions in the executable and prints out its address and name:

import idc
import idautils

print 'count %d' % len(list(idautils.Functions()))
for ea in idautils.Functions():
    print hex(ea), idc.get_func_name(ea)

The idautils module contains higher-level functionality like getting a list of functions, or finding code & data references to addresses. If you are familiar with IDC scripting, most of the functions by the same name can be found within the idc module. This is not really meant to be an IDAPython or IDC scripting tutorial, so you will need to look elsewhere for that.

Continue reading